
Among self-published composers, a common task is making making score-following videos, in which the sheet music follows along with the recording. Preparing your score for these videos is potentially super time-consuming. The hardest part — and the easiest to mess up — is cutting the score into screen-sized segments.
Using Dorico, however, making score follower images is a breeze. It took me less than 5 minutes today to create the images I needed for a video of my string orchestra piece Space Invaders!
Let me show you how I put it together.
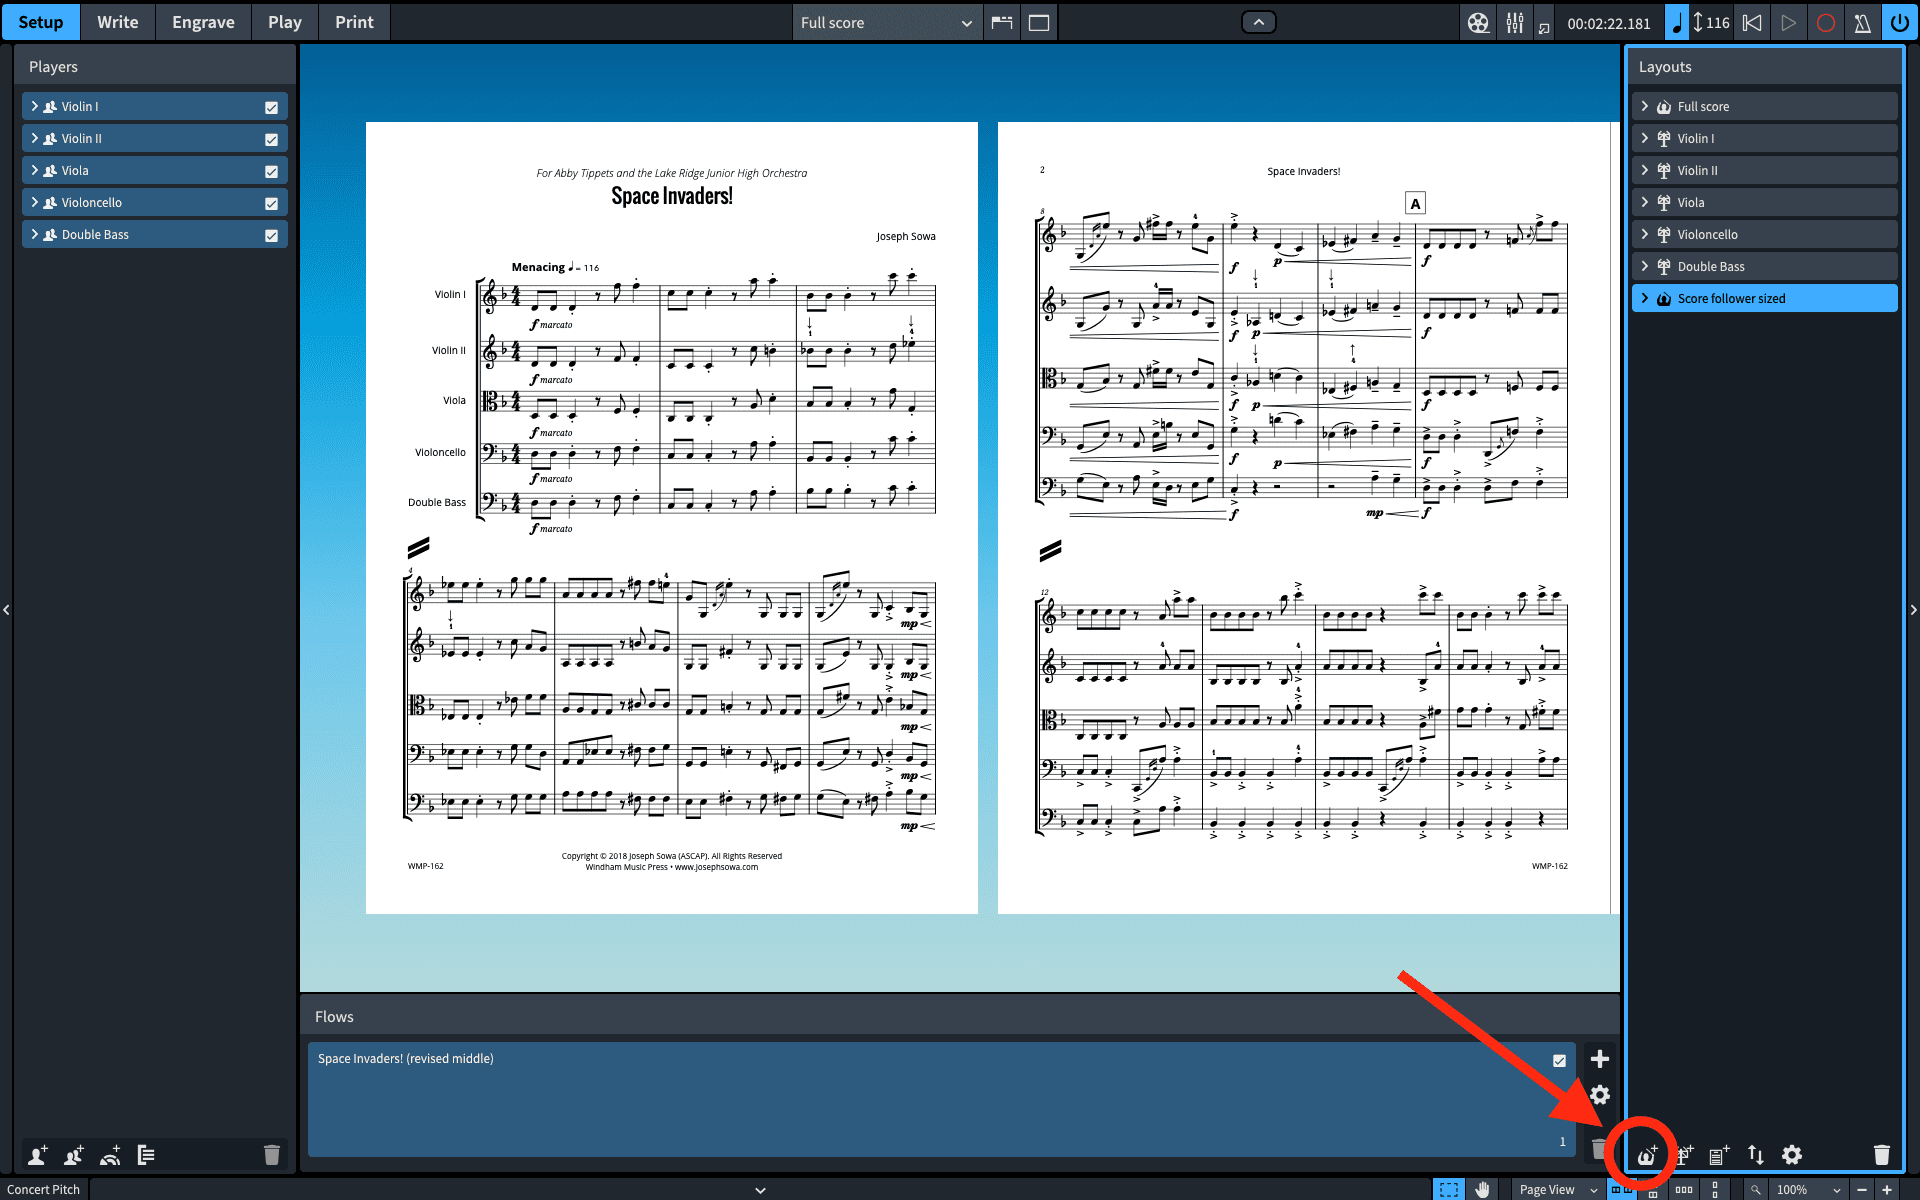
1. Create a new score layout and change its page size
First up, in “Setup” mode, I created a new score layout and renamed it “Score follower sized.” (Obviously, you can name it whatever you want.)
Next, in the program preferences (command+, on Mac), I changed the “preferred unit of measurement” to points.

“Why do that?” you may ask.
To help make changing the page size easier.
Given that high-res video is 1920 × 1080 pixels, by setting the page size to that exact proportion, whatever we export will automatically be the correct size.
So, next, with my new layout selected in the layouts panel, I clicked the little widget at the bottom to pull up the layout options.

Here I changed the page orientation to “Landscape” and the page size to 960 × 540 points, which keeps the 1.78:1 proportion. Using points, rather than inches, meant I could use easy, whole numbers.
(Note: Dorico here thinks we’re specifying a physical page size, not the dimension in pixels, so as long as you keep the proportion correct, you can use whatever size best suits your content.)
2. Create and tweak your master pages
So with my score the correct size, I then tweaked the master pages in “Engrave” mode to make sure I had everything I wanted on each page.
For more on using master pages, check out this video.

3. Prepare it for export
With everything set, I switched over to “Print” mode. Here, I told Dorico to export my file as png graphics. I also made sure to set the resolution to 300 dpi, so that the images would be nice and crisp for the video.

Lastly, to make organizing these files simple, I went into the “Filename Options” and made sure that each file was numbered by page.

And with that, after pressing export, I had all the images I needed, all the right size:

4. Making the Video
From there, I imported the images into Final Cut Pro and aligned them with the audio. Using Final Cut (or iMovie, etc.) is beyond the scope of this post, but I do need to make one important note: Dorico exports images with a transparent background.
This transparent background is no problem, though. In Final Cut, I simply created a white background on which to layer my score images. (It’s also easy in iMovie.)
Conclusion
And there you have it: in less than 5 minutes, you too can use Dorico to create all the images you need for your next score follower video.
Now, could you do a similar thing in Finale or Sibelius? Sure, but you’d have to create a separate file — which opens up all of the version-control issues that go along with doing that.

Don’t Miss Next Week’s Post
Sign up to stay in the loop about my music—and ideas for your own composing!
